
While the OneStopWP dashboard allows you to manage themes, plugins, backups, and core updates with a single click, direct access to the underlying filesystem remains essential for developers and webmasters. Whether you need to fix a broken plugin manually, upload custom theme assets, edit wp-config.php, or transfer bulk media files, FTP (File Transfer Protocol) and SFTP (Secure File Transfer Protocol) provide direct access to your hosting environment.
This guide walks you through creating FTP accounts in OneStopWP, configuring an FTP client, and connecting securely to your WordPress server.
What You Need Before Starting
Before attempting to connect, make sure you have:
- Access to your OneStopWP hosting control panel dashboard.
- An FTP client installed on your computer (popular options include FileZilla, Cyberduck, or Transmit).
- The domain name or IP address pointing to your hosting instance.
Step 1: Create an FTP Account in OneStopWP
OneStopWP makes managing server credentials straightforward through its clean client interface.
- Log in to your OneStopWP account.
- Navigate to FTP Accounts: Under My Hosting -> FTP Accounts.
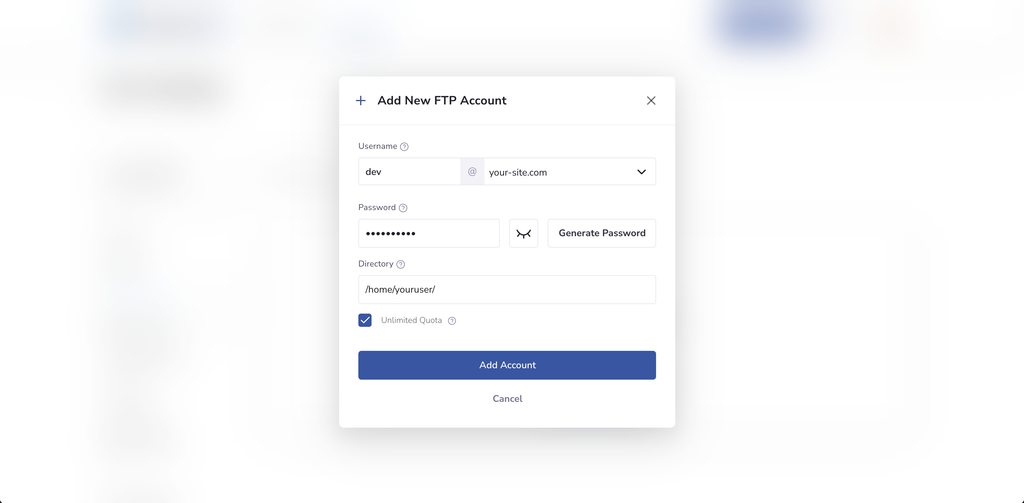
- Add a New FTP User: Click the + Add Account button.
- Configure Credentials:
- Username: Set a dedicated username (e.g.,
developeroradmin_ftp). - Password: Enter a strong password or click Generate to let the control panel generate a secure string automatically. (Make sure to store this securely).
- Directory Path (Optional): Specify the folder path this user can access. To allow access to the entire WordPress root directory, leave this field blank.
- Quota (Optional): Define a storage limit in MB or set it to Unlimited.
- Username: Set a dedicated username (e.g.,
- Save the Account: Click Add Account to save the user. The new entry will now appear in your active FTP accounts list.
Step 2: Retrieve Your Connection Details
Once created, you will need your connection parameters to enter into your FTP client.
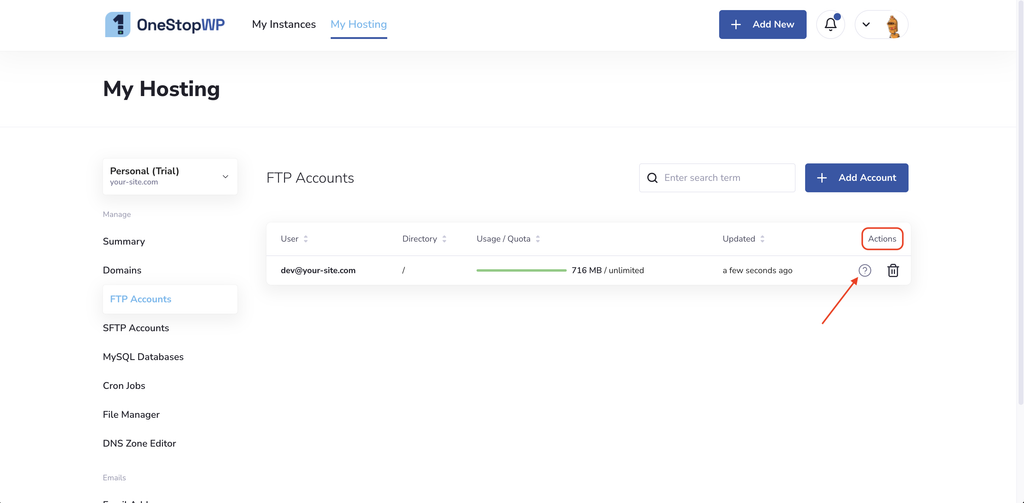
In the FTP Accounts table, click on the question mark icon under the Actions column.
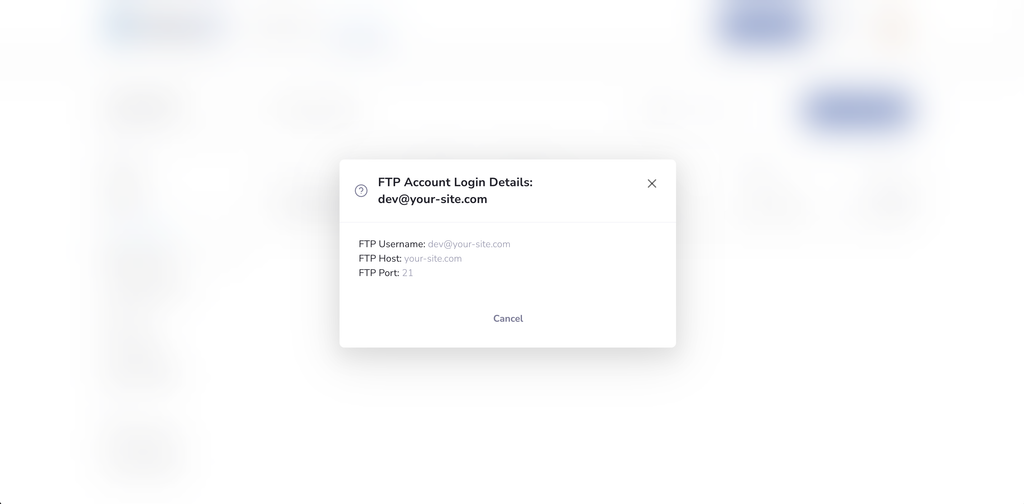
Take note of the following:
- FTP Username: The FTP username you just created.
- FTP Host: Your domain name (could also be
ftp.yourdomain.com, or the server IP address). - FTP Port: 21 for standard FTP / FTPS (Explicit TLS).
Step 3: Connect via FileZilla (or your preferred FTP client)
Using FileZilla as our standard example, follow these steps to connect:
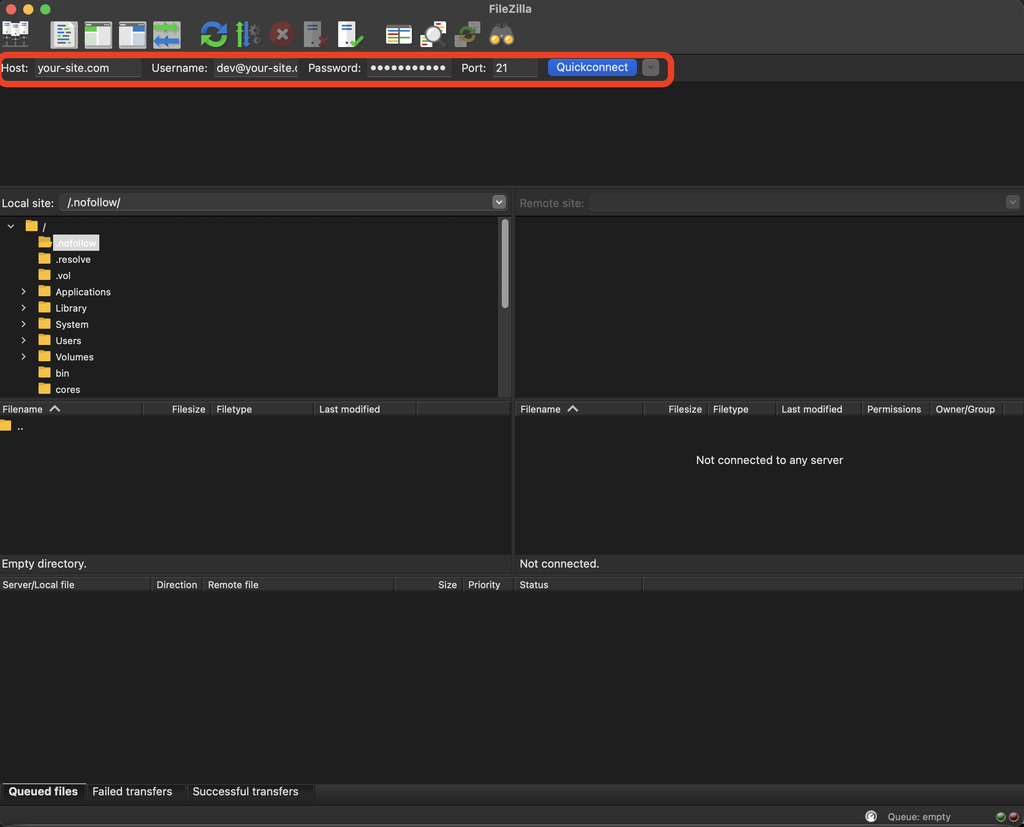
- Open FileZilla.
- Set the parameters:
- Host: Enter your domain name or server IP address.
- Username: Enter your OneStopWP FTP username.
- Password: Enter the password created in Step 1.
- Port: 21
- Click Quickconnect.
- If prompted with an SSL/TLS Certificate dialog, check "Always trust this certificate" and click OK to establish the session.
Best Practices & Security Tips
- Use Dedicated Accounts for Developers: Never share main control panel passwords. Create temporary FTP accounts in OneStopWP restricted strictly to the required directory (e.g.,
/wp-content/themes/my-theme) and delete the FTP account when work is finished. - Always Enforce Encryption (FTPS/SFTP): Avoid sending unencrypted plain-text FTP traffic over public networks. Always use FTPS (explicit TLS) or SFTP.
- Backup Before Uploading/Editing: Editing live PHP files over FTP can trigger syntax errors or site downtime. Always generate a manual snapshot in the Backups tab before modifying core files via FTP.
Streamlined Site Management with OneStopWP
Managing website files doesn't have to be cumbersome. Powered by modern architecture, OneStopWP managed hosting combines automated database tuning, instant backups, custom caching via WPCacheOn, and simple account management-giving webmasters full control with maximum security.
👉 Looking for high-performance managed WordPress hosting? Check out OneStopWP hosting plans today.